|
Pressure CookingSkip down to Guidelines for Processing Times
CAUTION: If your pressure canner has a weighted pressure regulator, and the reading on the gauge goes very much over 15 pounds, something is wrong. TURN THE HEAT OFF, take everyone out of the room and LEAVE IT ALONE until the pressure has come back to zero for a while. Then and only then can you open the lid to see what went wrong. If your pressure canner does not have a weighted pressure regulator, you need to adjust the heat to prevent the pressure from approaching the caution zone.
At the beginning of each canning season, have your pressure gauge tested. Check with your local county extension office to see if they will do this for you.
The pounds of pressure that you process at when pressure cooking is determined by your altitude. Your local extension office will give you this information, Or you can refer to the table below.

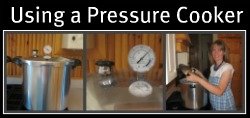
Place your filled jars on the rack in the pressure canner. You can fit 7 quart jars or 20-pint jars in a pressure canner at one time. You need two racks when filling the canner with pints. One goes on the bottom and one goes between the two layers. For quarts just put one rack on the bottom. Pour three quarts of water into the canner. The water should be about three inches deep. Twist and lock the pressure canner lid down into place.
After a while, steam will start to come out of the vent pipe. When you see a steady stream, set the timer for 10 minutes, and let it vent. 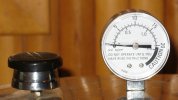
When the timer rings, put the pressure regulator on the vent pipe. The pressure in the canner will start to rise.

As the pressure rises, the air vent/cover lock will pop up. The lid is now locked on. The air vent/ cover lock also releases some air from the canner as the pressure goes up. This is a safety feature of the pressure canner. Heat the canner until the pressure gauge comes up to pressure, then adjust heat to keep it at that pressure.
If your pressure canner doesn’t have a weighted pressure regulator, you need to adjust the heat to keep the the pressure from going too high. These older pressure canners have to be watched very carefully. If you are processing your food below 15 pounds of pressure you will need to adjust the heat to keep the gauge at the right pressure. (At 5,000 feet I am supposed to process at 13 pounds. When pressure cooking, I process at 15 pounds because I don’t want to have to fiddle with adjusting the heat so much. But I do turn the heat down a little once the gauge gets up to 15 pounds. I am over-processing my food by 2 pounds. Never under process your food.) Now that the canner is up to pressure, set the timer.
Guidelines for Processing TimesVegetables, meats and poultry (low-acid foods) must be canned in a steam pressure canner at 240 degrees F for the appropriate time to destroy heat-resistant bacteria. At sea level to 2000 feet, 11 pounds of steam pressure will produce this temperature. Above 2,000 feet, steam pressure must be increased to reach 240 degrees F as illustrated in the pressure cooking altitude adjustment table.
Beets 35 minutes for quarts, 30 minutes for pints Carrots 30 minutes for quarts, 25 minutes for pints Spaghetti Sauce Without Meat 20 minutes for pints & 25 minutes for quarts Tomatoes (crushed or Pureed) 15 minutes for pints & quarts Tomatoes (Whole) 25 minutes for pintes & quarts
Leave the pressure canner alone until the pressure gauge comes back down to zero. Once the gauge is back down to zero remove the pressure regulator and open the lid away from you.

I’m going to say it again, do NOT take the lid or pressure regulator off until the pressure gauge comes down to zero. This usually takes about 30 minutes. Take the processed jars of food out of the pressure canner with your jar lifter. Place your hot jars on a double layered towel. Leave them there to cool overnight. Return to: |
||||||||||||||


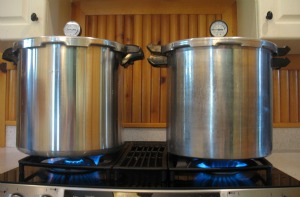
 Turn the stove on to high heat. (DO NOT do any pressure cooking on an outside camp stove. The heat is too fast and hot for a pressure canner.)
 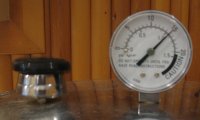 The newer pressure canners have a pressure regulator that will start rocking and releasing pressure at about 15 pounds. This is a safety feature.
  When the timer rings, turn off the heat.

